Tuesday, September 30, 2014

H is for Hat!

H was for hat this week!

The resources we used this week were…

App:
Blue Hat, Green Hat (Sadie LOVES this app!)

Videos:

Monday:

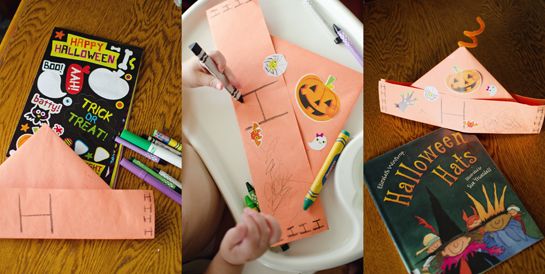
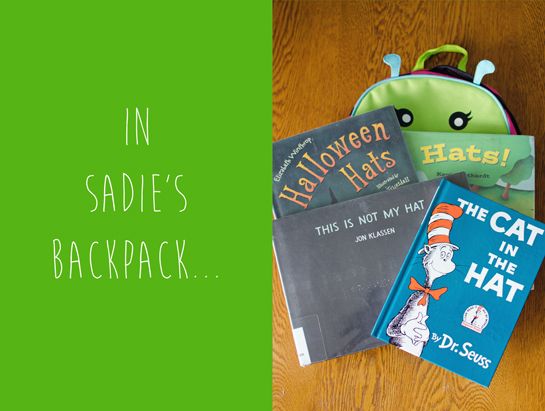
This week we got Hats by Kevin Luthardt, Halloween Hats by Elizabeth Winthrop, and This is Not my Hat by J. Klassen from the library. We have The Cat in the Hat at home, and it’s one of our favorites. Sadie especially loved the Halloween Hats book this week!


 photo Sadiesbackpack_H_zps5c63ea79.jpg

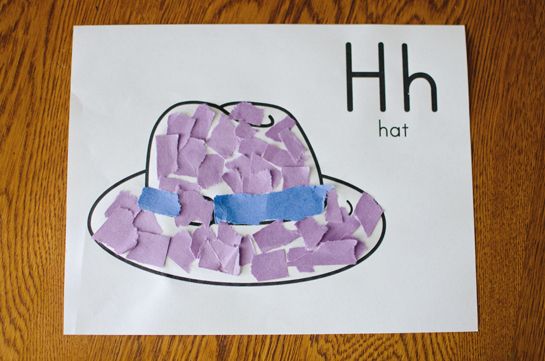
We talked about the letter “H,” then Sadie picked purple construction paper to make her mosaic hat.

 photo DSC_4878_zpsf65c405d.jpg

Tuesday:

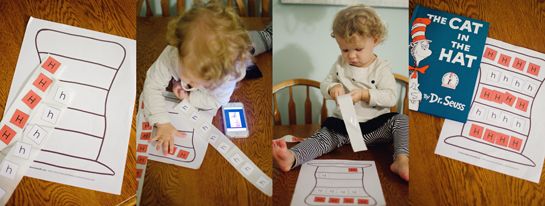
Sadie loves Dr. Seuss’s The Cat in the Hat, so I made a little game with the cat’s hat to practice her letter recognition. The printable is available in the lesson plan. Because stickers are probably Sadie’s favorite thing right now, I used my Xyron to make the letters into stickers (I have THIS one—super cheap and very cool!). If you don’t have a Xyron, you can obviously just let your little one glue the letters down. The uppercase “H’s” create the red stripes, while the lowercase “h’s” create the white stripes on the hat. Sadie needed a fair about of guidance with this activity, but she really enjoyed it (seriously, she enjoys anything with stickers).

 photo DSC_4494_zps6eb87809.jpg

Wednesday:

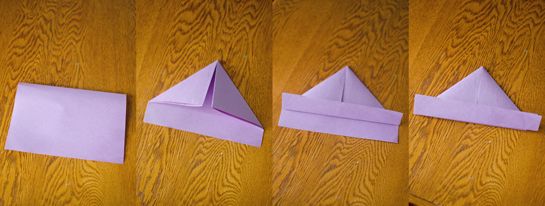
On Wednesday we made some rad, old-school paper hats. I think this is a pretty essential part of childhood. Hasn’t everyone made one? I used newspaper as a kid, but we only had construction paper on hand. I had to tape two standard-sized pieces together to make it big enough for Sadie’s pumpkin head. Folding the hat is super easy—only three steps:

 photo DSC_4820_zps848e3727.jpg

Since Sadie was digging Halloween Hats, I let her make her own. She decorated her Halloween hat with some fun stickers I found in Target’s One Spot a few weeks ago. She wore her hat all week, exclaiming: “Hat! HAT! HAT!!” 

 photo DSC_4842_zpscba3a0be.jpg

Thursday:

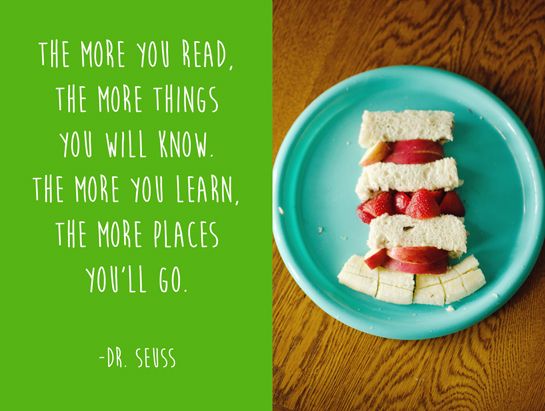
I made a cute Cat in the Hat-inspired lunch for Sadie on Thursday. I layered Sadie’s sandwich with apples, strawberries, and a banana to look like the Cat’s hat.

Sadie loves these themed snacks and meals, but I love them even more. To me, they’re worth the extra time and effort. They’re not just fun for Sadie, they also create new opportunities for learning. This silly little sandwich in the shape of a hat is a new opportunity to talk about the word “hat,” about the letter “H,” and the color red. Y’all, there are opportunities for your little one to learn in just about everything. And, like Dr. Seuss said: “The more you learn, the more places you’ll go.”

 photo DSC_4807_zps751b0b0b.jpg 

Friday:

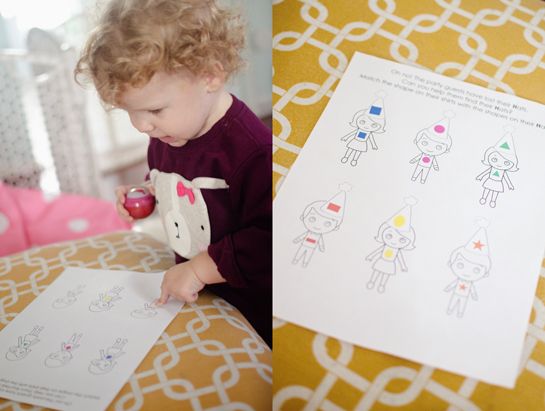
On Friday Sadie did a little matching worksheet that I created to reinforce what we’ve been learning about shapes (we work on our shapes using THIS Melissa and Doug puzzle). In this activity each of the hats has a colored shape that corresponds with a “party guest’s” shirt. I used the Xyron again for this activity, so that the hats would be stickers for Sadie, but glue would work just as well. You could also skip the glue, and store the hats in a plastic sandwich bag, then use this activity as a matching game that can be played over and over.

 photo DSC_4560_zps1f58bcbc.jpg

Weekend Fun:

I had planned to have a family hat party, and I’m so sad it didn’t happen. I found some fun plastic hats in Target’s One Spot (love that place), and the plan was for each of us to decorate one. Then, we were going to put our new, awesome hats on, turn on some jams, and have a dance party. I hope you guys are having family dance parties. If not, you’re totally missing out, and need to start RIGHT NOW. The sillier, the better.

If you guys have a family hat (dance) party, please send me pictures!    
----

Download the lesson plan HERE and enjoy!

Note: make sure you set up your printer to print borderless before printing the lesson plan!

If you have any questions or comments, please feel free to use the comment section below or email me at janiewhitetaylor@gmail.com. I’d love to help you make the project work for your little one! 

Happy learning to you and your future nerds!

Monday, September 22, 2014

G is for Green!

G was for green this week, y'all!

The resources we used this week were…

Songs:
10 Green Bottles (Another annoying song... you're welcome!)

Videos:
ABCMouse.com 'The Letter G Song'
Storybots 'Gimme G'
Olive and the Rhyme Rescue Crew 'G'


Monday:

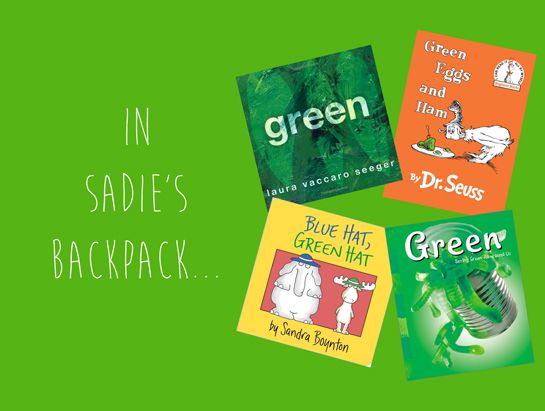
I was seriously under the weather this week, and I had a couple doctor's appointments, so we never did make it to the library. We read two books that we already own: Green Eggs and Ham by Dr. Seuss and Blue Hat, Green Hat by Sandra Boynton. I also picked out two books from the Library’s online catalog, but never picked them up: Green: Seeing Green All Around Us by Sarah Schuette and Green by Laura Vaccaro Seeger.

 photo Sadiesbackpack_G.jpg

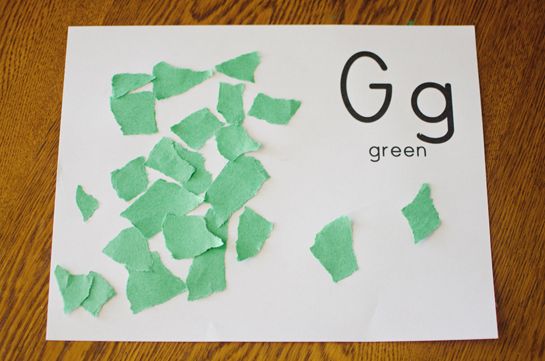
For her mosaic this week, I just let Sadie add green construction paper in whatever pattern she wanted.

 photo DSC_4483.jpg

Tuesday:

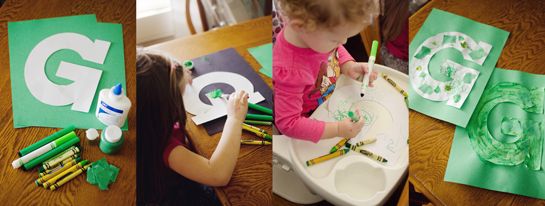
On Tuesday we decorated a big “G” to hang in Sadie’s play area. Sadie and her friend used some glitter (which obviously ended up all over the house), crayons, markers, some ripped up paper, and a little bit of paint to decorate their G's. Sadie glued her G to a piece of construction paper, and we hung it up to see and practice with all week.

 photo DSC_4317.jpg

Wednesday:

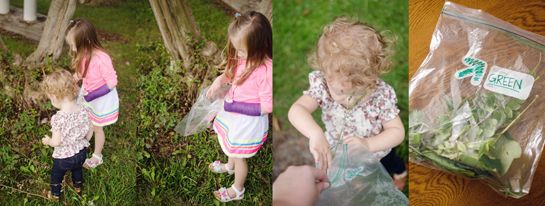
We had lots of fun at the park on Wednesday. I wrote the word “Green” and scribbled some green marker (for reference) on a gallon-size plastic bag, and took Sadie and her friend to the park. We explored the park to find different shaped and textured green things. Sadie is an independent little explorer, so she really loved this activity. They were so proud of their bag full of green discoveries.

 photo DSC_4335.jpg

Thursday:

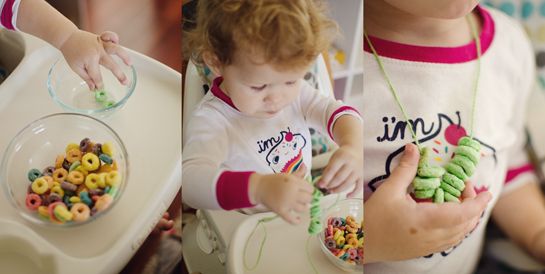
We played with Froot Loops in our jammies this week. Sadie sorted out the green Froot Loops, and then we strung them onto a piece of string. This is one of the easiest activities we’ve done, and it was a big hit. Sadie wore her necklace around all morning, and slowly ate all of the Froot Loops—snack on the go!

 photo DSC_4450.jpg

Friday:

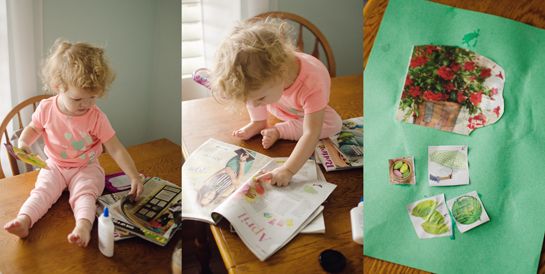
If you’re like most of us, and you’ve got some old magazines lying around that you’ve been meaning to throw away, you’re going to love this activity. We put this old magazines to use, and went on a green hunt (again in our jammies... can you tell I wasn't feeling well?). We flipped through the magazines, Sadie pointed out green things, and I cut them out. I got her some safety scissors, but she’s not quite coordinated enough for them yet. If you have an older child, he/she can be more independent with this activity. Once Sadie was done hunting, she glued her findings on the back of the “Green G” picture we made earlier in the week. I moved the picture to the fridge, so that she could see it, but was able to take it down to look at both sides.

 photo DSC_4382.jpg

Weekend Fun:

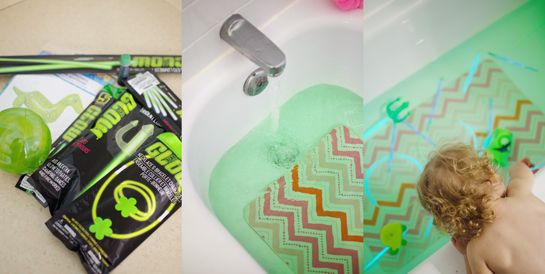
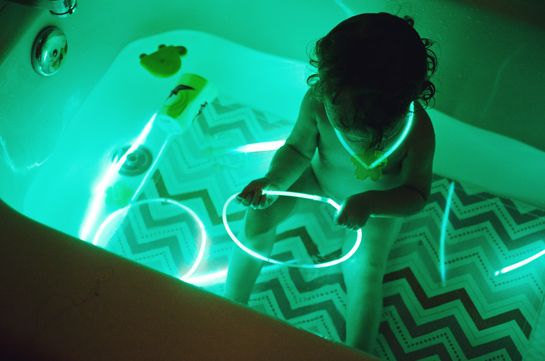
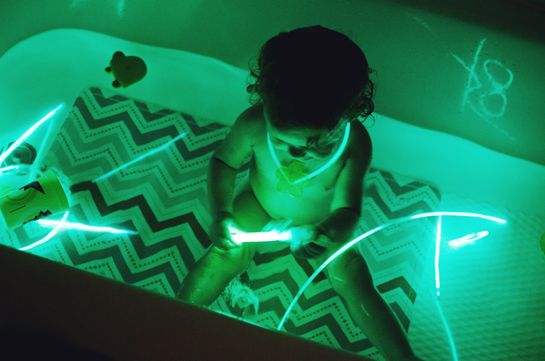
To end our green week, Sadie had a super fun green bath. I put a few drops of green food coloring in the tub, and threw in a few green dollar store toys. Then I flipped the lights off and tossed in some green glow sticks.

 photo DSC_4400.jpg

She had a blast, and I had almost as much fun. We love glow in the dark baths around here, but I think this green one was the best yet.

 photo DSC_4438.jpg  photo DSC_4442.jpg
----

Download the lesson plan HERE and enjoy!

Note: make sure you set up your printer to print borderless before printing the lesson plan!

If you have any questions or comments, please feel free to use the comment section below or email me at janiewhitetaylor@gmail.com. I’d love to help you make the project work for your little one! 

Happy learning to you and your future nerds!
Tuesday, September 16, 2014

F is for Frozen!

F was for Frozen this week, and we were in Disney princess heaven!

The resources we used this week were…

Songs:
You can listen to the Frozen soundtrack HERE!

Videos:
ABCMouse.com 'The Letter F Song'
Storybots 'F is Fun'
'Let it Go' Sing-a-long


Monday:

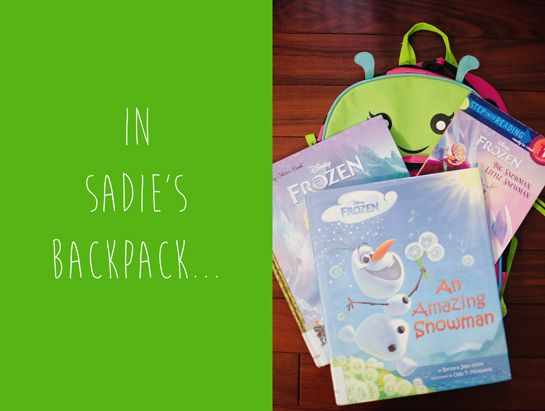
This week we got Frozen by Bill Scollon, A Sister More Like Me and An Amazing Snowman by Barbara Jean Hicks, and Big Snowman, Little Snowman by Tish Rabe from the library. Sadie loved all of them!

 photo Sadiesbackpack_F_zps56573141.jpg

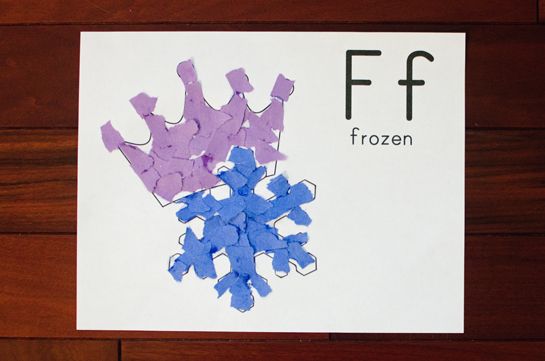
We read through our new books, and practiced saying our new letter, then did our Frozen mosaic.

 photo DSC_4234_zps039aaccf.jpg

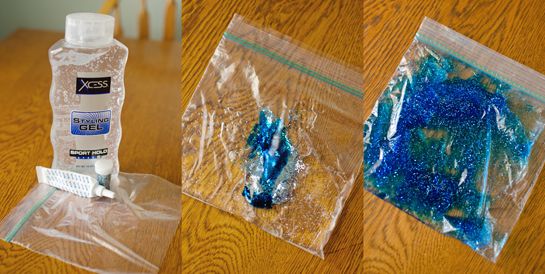
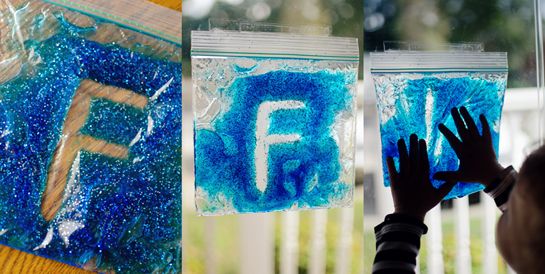
To practice our recognition of the letter “F” I created an “ice writing” activity for Sadie to use through out the week. We put clear hair gel (found at the dollar store), blue food coloring, and glitter in a plastic sandwich bag. I taped the bag closed, because I knew my crazy-curious daughter would try to open and eat the gel.  Over the course of the week, we used the bag on the storm door, on the kitchen table, and even on the wood floor.

 photo DSC_3962_zps464a0d69.jpg
 photo DSC_4000_zpsd5c16fc2.jpg

Tuesday:

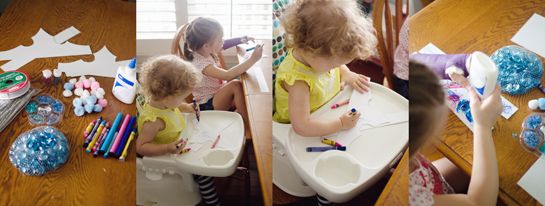
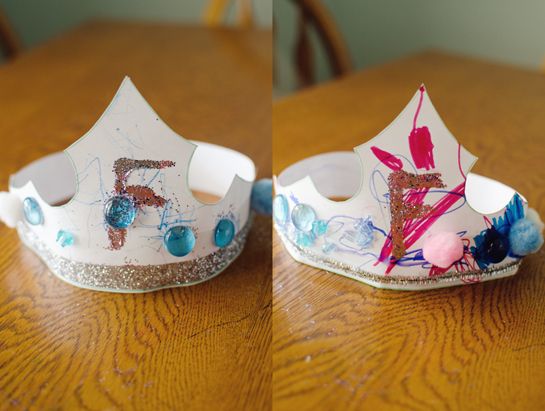
On Tuesday Sadie’s friend was over, and we all made princess tiaras. I found the tiara template on firstpalette.com, and I’ve included it in the lesson plan. And, don't worry, I also included a crown for the little princes! We worked together to put glittery “F’s” on the center of their tiaras. Then, I threw a bunch of crayons, markers, and shiny things on the table, and let the girls go to town tricking out their tiaras. Sadie wore hers all week!

 photo DSC_3903_zps41800b4d.jpg
 photo DSC_3956_zps0a42face.jpg

Wednesday:

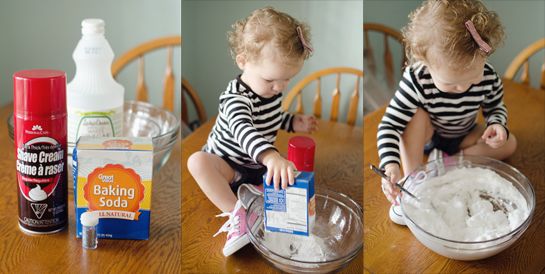
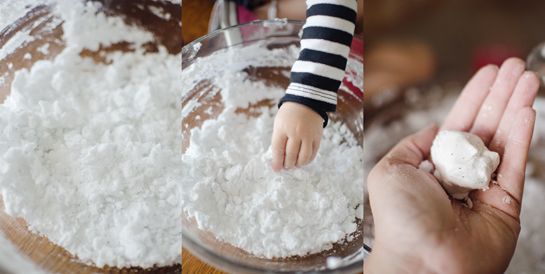
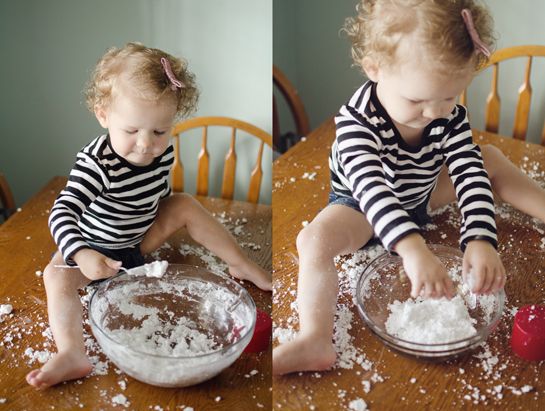
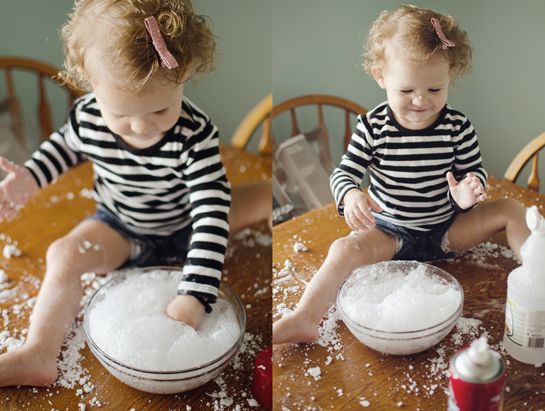
We had lots of fun on Wednesday! Sadie made snow, and then we made a huge snowstorm just like Queen Elsa. The snow is super simple, and so much fun. Just mix baking soda and shaving cream in a big bowl.   

 photo DSC_4031_zps4adfd00e.jpg
It feels cold like snow, and the texture is really similar. You can even make snowballs!  photo DSC_4054_zps593cfb87.jpg
Sadie had so much fun playing in the snow. She could've done it all day. She made a huge mess, but her shrieks and smiles were so worth it.  photo DSC_4065_zps6ce836c1.jpg
When we were done making snowballs and snowmen, we were ready for the snowstorm. Pour some vinegar over the snow, and watch the “snow” turn into Elsa-scale “snowstorm” that grows and spreads. Science, y’all.  photo DSC_4081_zpsb7ecd56c.jpg

Thursday:

This week I made Frozen pancakes. I added blue food coloring and blueberries. I made a letter “F,” a snowman, Elsa’s glove, and a tiara. They all looked pretty crazy (apparently pancake art is hard), but they sure did taste good. I went with pancakes, because Sadie doesn’t like a whole lot of variety, but there are tons of cute Frozen-themed snack ideas out there. You can get creative, or I’m sure Pinterest can hook you up too. 

 photo DSC_4100_zpsddd24c17.jpg

Friday:

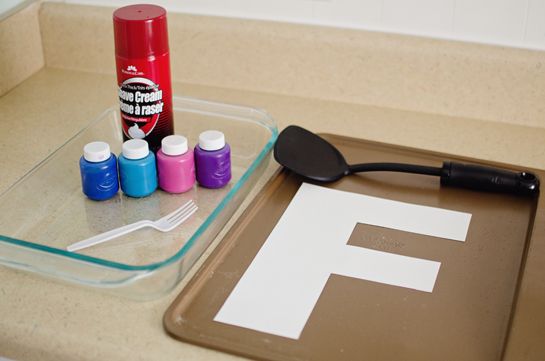
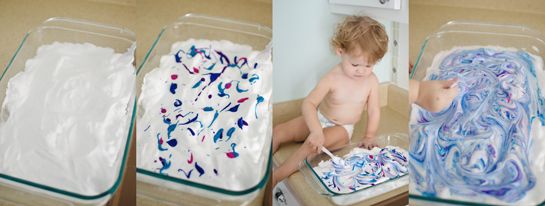
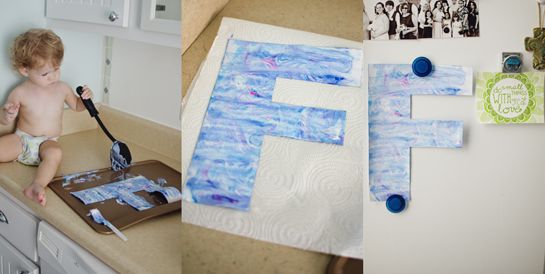
The snow painting we did on Friday was my favorite activity for the week. I liked it so much that I kind of want to do it by myself. We spread shaving cream in a Pyrex dish and pretended it was snow. We spread some paint around in the “snow,” dipped our letter “F” in the “snow,” then used a spatula to squeegee the extra “snow” off. There are more detailed instructions in the lesson plan, but it was a super easy project. I think the letter turned out really pretty!  photo DSC_4260_zps1b57df0d.jpg  photo DSC_4263_zps585dc2bd.jpg  photo DSC_4288_zps4cc969a2.jpg

Weekend Fun:

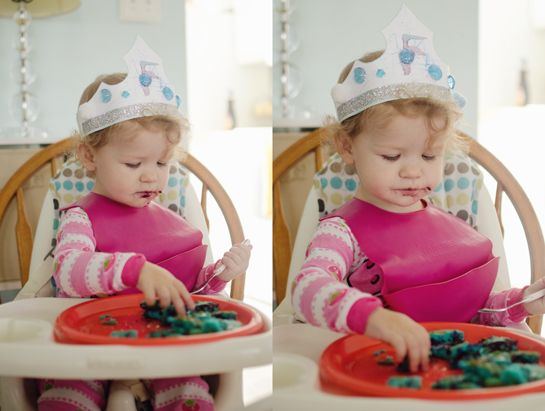
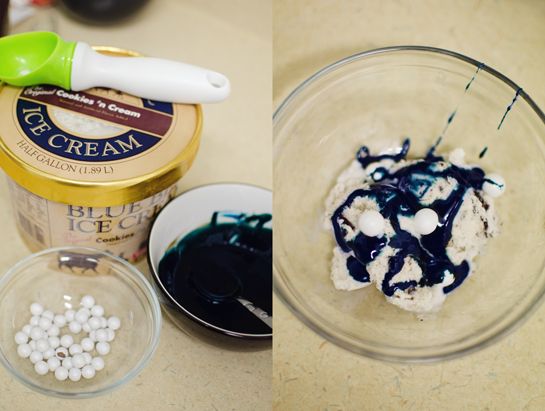
To celebrate our “F is for Frozen” week we had a family movie and ice cream party. To amp up the Frozenness of our ice cream, I added some blue food coloring to the chocolate syrup, and threw in some chocolate candy snowballs. Then, we piled on the couch in front of Frozen, and sang along.

 photo DSC_4107_zps8f10374e.jpg  photo DSC_4137_zpsac787de4.jpg
----

Download the lesson plan HERE and enjoy! 

(Note: make sure you set up your printer to "borderless printing" before printing the lesson plan!)

If you have any questions or comments, please feel free to use the comment section below or email me at janiewhitetaylor@gmail.com. I’d love to help you make the project work for your little one! 

Happy learning to you and your future nerds!
Monday, September 8, 2014

E is for Elephant!

This week we learned that “E is for Elephant!" We celebrated Labor Day at the beach this week, so the letter “E” got a little short-changed. We did our daily activities Tuesday-Friday, and just skipped the food activity on Thursday. The lesson plan PDF is normal though (including a “playing with our food” activity), so our short week won’t mess you up! 

The resources we used this week were…

Songs:
'Dance with the Elephant' by Storybots

Videos:
ABCMouse.com 'The Letter E Song'
Storybots 'Everybody has an E'
Elephant YouTube Videos (We love this one of a baby elephant ribbon dancing, but there are tons on YouTube!)


Tuesday:

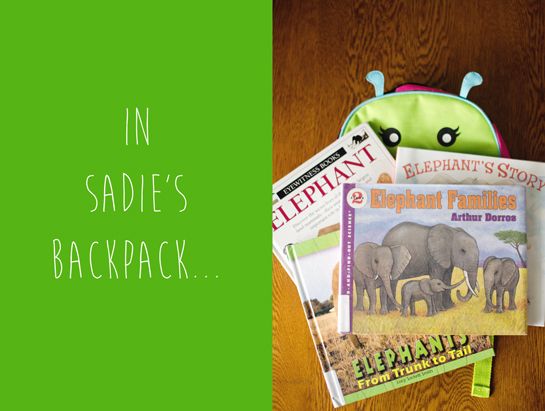
This week we got Elephant Families by Arthur Dorros, Elephant’s Story by Tracey Campbell Pearson, Eyewitness Books: Elephant by Ian Redman, and Elephants from Trunk to Tail by Lucy Sackett Smith. They were all non-fiction, except Elephant’s Story, so we learned lots about elephants this week. I love the Eyewitness Books – so much information and great pictures!

 photo Sadiesbackpack_e_zps7692102d.jpg

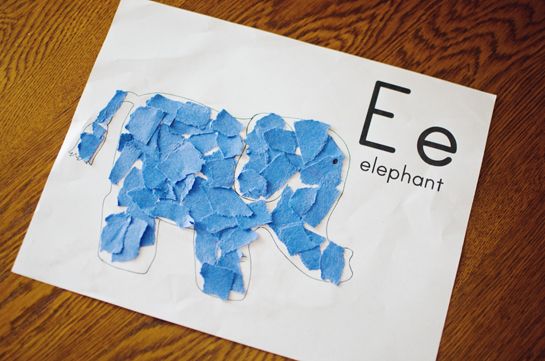
After reading through the new books and talking about this week’s letter, Sadie made a mosaic elephant for her alphabet book.

 photo DSC_3885_zpsf116c0b1.jpg

Wednesday:

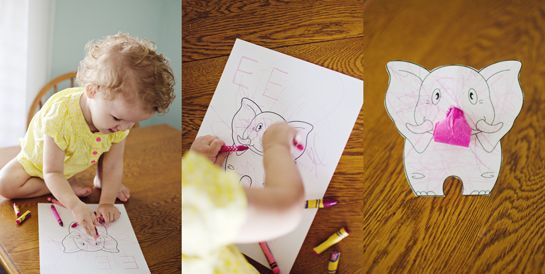
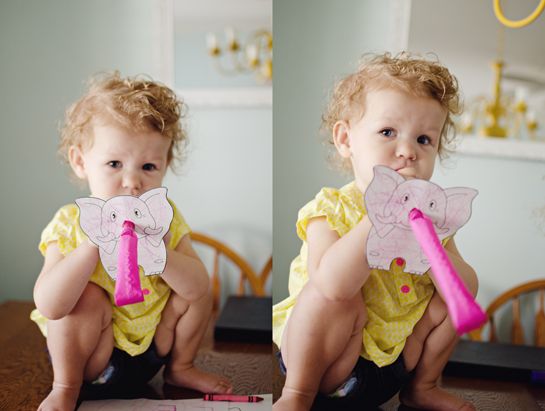
On Wednesday Sadie created her own elephant with a party blower. While searching through elephant coloring pages, I found a finger puppet elephant on the Crayola website. I thought Sadie would have more fun using a party blower as a trunk, rather than her finger (plus, she has itty bitt fingers!). I found a pack of five party blowers for less than $1 at Walmart. They’re also available at Target and most dollar stores.

I printed the elephant picture for Sadie, and she colored it in different shades of pink to match the party blower/trunk.  As she was coloring I wrote out letter E’s in the white space around the elephant and she practiced saying the name and sound. She also had a lot of fun with elephant impressions!

When she was done coloring I cut the elephant out, including the hole in the middle. I stuck the party blower in the hole from the front so that only the rolled paper is sticking out of the elephant’s face.

 photo DSC_3771_zps0c8b4d7d.jpg

She has been obsessed with blowing the elephant’s trunk all week! 

 photo DSC_3785_zps3fce2a65.jpg

Thursday:

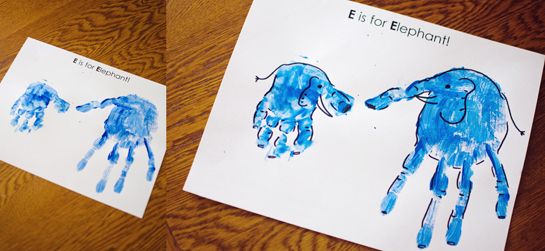
We made handprint elephants on Thursday. Super simple, and Sadie loves anything with paint. I did a handprint too, so we ended up with a mama and baby elephant. Once they were dry, I used a sharpie to add on elephant details like ears and tusks. I'm no artist, so they’re a little funky, but I think they turned out pretty cute anyway.

My handprint was a little bit of a fail, so I had to fix it with the paintbrush. I promise my fingers aren’t all crooked…

 photo DSC_3803_zpsaa7f116a.jpg

Friday:

There are detailed instructions on the lesson plan, but we had a little fun pretending to have elephant trunks on Friday. We read and talked about how elephants use their trunks, and then we grabbed some straws and pretended they were our trunks.  We blew bubbles and painted with our “trunks.”

Sadie required some guidance and practice with this activity since she’s used to sucking IN with her straws. I obviously didn’t want her to drink the paint. We practiced blowing out of the straw until I was confident I wouldn’t be needing poison control. Older kids won’t need as much direction!

 photo DSC_3839_zpsfcb394b1.jpg

Weekend Fun:

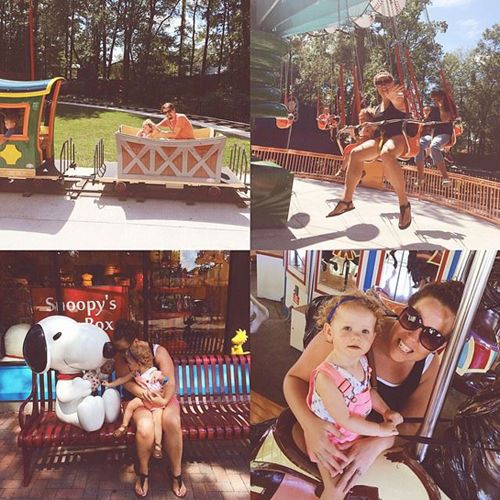
This weekend we went out of town for Sadie’s first amusement park adventure, so we didn’t do anything elephant related. If we stayed in town, we would’ve visited the elephants at the zoo.  The elephant exhibit is her favorite! 

Side note: I may have cried a little bit when I watched Sadie ride her first ride this weekend. I’ve become that mom. OMG, so proud of her for sitting on a cart moving 2mph! Don’t judge me – I’m judging myself enough for both of us.

 photo 10649639_10101617736884668_6140474875551148813_n_zpsb0ac78d4.jpg
An Instagram look at Sadie's first amusement park adventure!


----

Download the lesson plan HERE and enjoy!

If you have any questions or comments, please feel free to use the comment section below or email me at janiewhitetaylor@gmail.com. I’d love to help you make the project work for your little one! 

Happy learning to you and your future nerds!
Monday, September 1, 2014

D is for Dinosaur!
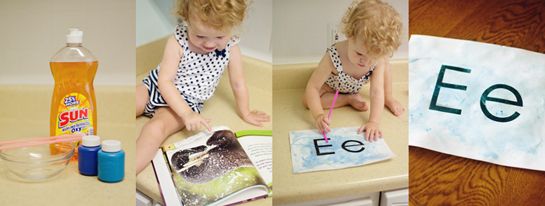
Sorry I’m posting this so late… we spent Labor Day at the beach!

----

This week “D is for Dinosaur!” Dinosaurs are one of Sadie’s favorite animals, so this week was lots of fun!

The resources we used this week were…


Monday:

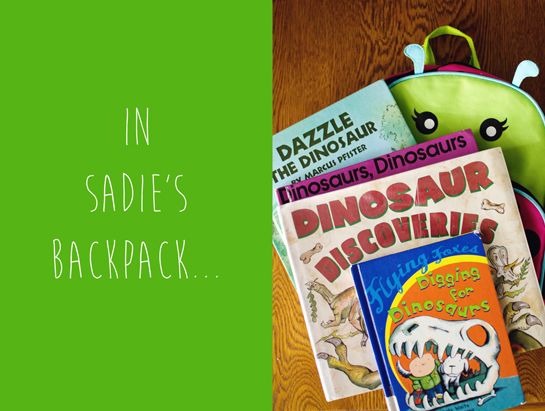
Nearly all of the books I wanted to get this week were checked out already, but we still managed to get four great dinosaur books from the library: Digging for Dinosaurs by Judy Waite, Dinosaur Discoveries by Gail Gibbons, Dinosaurs, Dinosaurs by Byron Barton, Dazzle the Dinosaur by Marcus Pfister. Dinosaurs, Dinosaurs was Sadie’s favorite this week. She liked it so much, I’m thinking of buying it!

 photo Sadiesbackpack_D-1.jpg

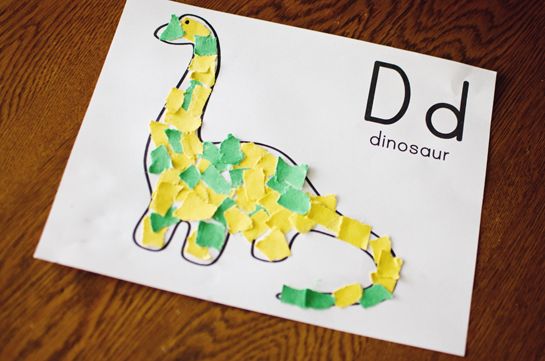
We talked about our new letter, then worked on a dinosaur mosaic for the alphabet book. I helped Sadie keep the glue stick insides the lines, and then she put the paper down. I had to help a little more this week, because the dinosaur tail and feet are kind of skinny.

 photo DSC_3572.jpg

Tuesday:

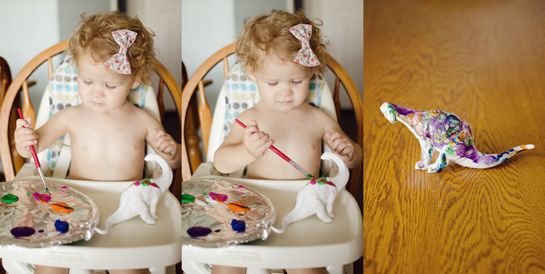
On Tuesday Sadie got to paint her very own dinosaur!

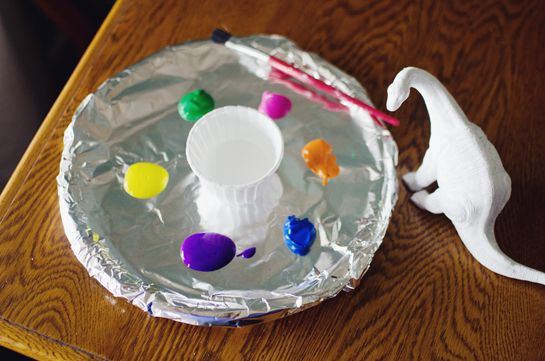
While grabbing groceries Monday night, I let Sadie pick out a $1 plastic dinosaur at Walmart (she picked the diplodocus). If you don’t have a Walmart, they also sell similar plastic dinosaurs at Target and most dollar stores. Before we began the project, I painted the dinosaur white with non-toxic acrylic paint (I always use Apple Barrel). I just did one quick coat, and it took me less than five minutes. It took about 20 minutes to dry. This step is definitely optional. I chose to paint it white since our dinosaur was grey, and I wanted Sadie’s painting to stand out.

 photo DSC_3584.jpg
For painting the dinosaur, Sadie used Crayola washable paints. I prefer Apple Barrel, but we had Crayola paints on hand. I let Sadie pick her favorite colors, then handed over the paint, paint brush, and dinosaur and let her have at it. As she painted, we practiced saying the letter name and sound. She also practiced her dinosaur noises, which are pretty awesome.

After the paint was dry I coated the dinosaur in a thin layer of Mod Podge. Again, this step is optional. I wanted Sadie to be able to play with her dinosaur and was afraid the Crayola paint might chip off.

 photo DSC_3588.jpg

Sadie's been playing with her dinosaur all week!

Wednesday:

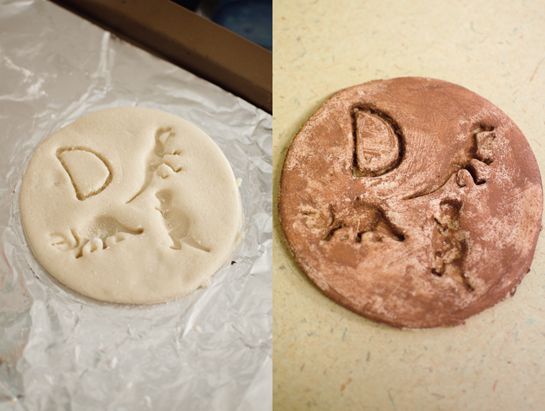
We made salt dough fossils on Wednesday. Most of you will already have what you need to make the dough—one cup of flour, one cup of salt, and half a cup of warm water. The instructions for making the dough are all written out for you on the lesson plan PDF, and trust me, it’s super simple.

While we were at Walmart we also picked up a $3 package of miniature plastic dinosaurs. She chose her three favorites for this project, and we saved the rest for a different activity.  She pressed them into the dough, I helped her draw a letter “D,” and we baked it at 250 degrees (I recommend 300) for 2 hours. It wasn’t quite done after two hours, so next time I will turn the oven up a little.

 photo DSC_3610.jpg
Once the dough was fully baked, Sadie painted the fossil with one coat of brown paint. This step isn’t necessary, but we wanted it to look a little more like a real fossil. I think the one coat makes it look like dirt/mud!

 photo DSC_3639.jpg

Thursday:

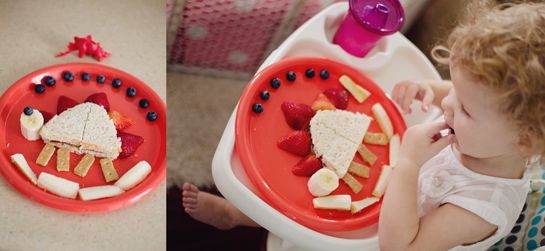
This week I played with Sadie’s food, but she sure did enjoy it. I created a stegosaurus with her PB&J and fruit. It looked way cuter in my head, but she loved it. When I put it on her tray she gasped and laughed. So, I encourage y’all to get creative this week, and surprise those sweet kids. Use your little one’s favorite foods to make a fun dino lunch, then send me a picture!

 photo DSC_3663.jpg

Friday:

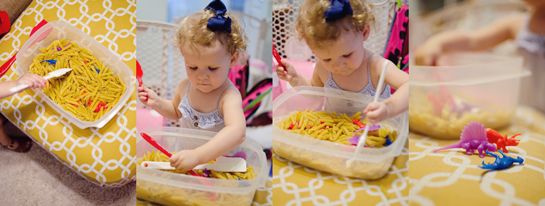
I planned for Sadie to do some digging in her sandbox on Friday, but of course, it rained! Instead, we improvised, and dug for dinosaurs and “D’s” inside. I created some “D’s” out of pipe cleaners. I filled a bucket with noodles, and hid some miniature dinosaurs and “D’s” inside. I gave Sadie a few “tools,” and she loved digging and searching for the dinos and “D’s.” This activity held her attention for a long time. It would be a great activity to set up for your little one for when you’re trying to cook dinner or get a few things done around the house.

 photo DSC_3699.jpg

Weekend Fun:

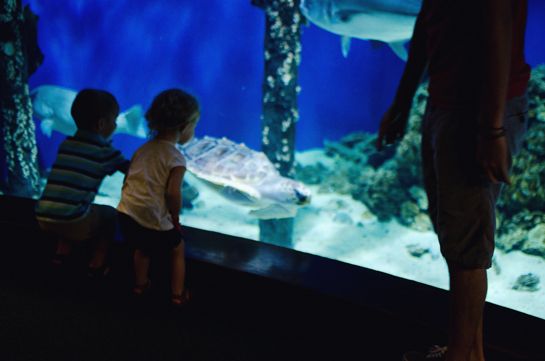
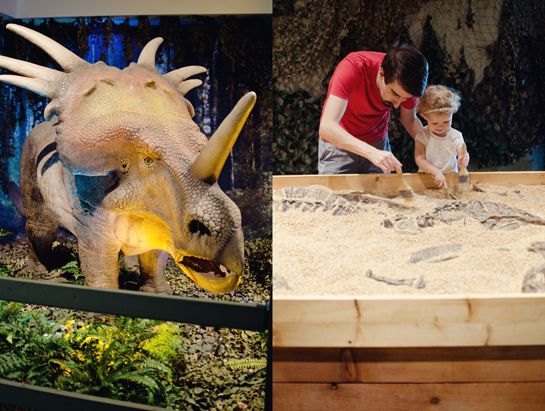
A local museum has a really cool dinosaur exhibit right now, so we picked up Sadie's cousin and headed over there to check it out this weekend. The dinosaurs were awesome, but because they were animatronic, they seriously freaked Sadie out. She wasn’t much into the dinosaurs, but we had a fun day at the museum anyway.

 photo DSC_3674.jpg  photo DSC_3679.jpg

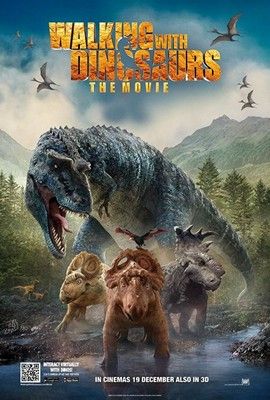
If you don’t have a local museum, rent Walking with Dinosaurs from your library or a nearby Redbox. It’s a fun movie, and Sadie loved it. Grab some snacks, make a blanket fort, and enjoy a family movie night!


 photo 20131222203208Walking_with_Dinosaurs_film_poster.jpg

----

Download the lesson plan HERE and enjoy!

If you have any questions or comments, please feel free to use the comment section below or email me at janiewhitetaylor@gmail.com. I’d love to help you make the project work for your little one! 

Happy learning to you and your future nerds!